so i know i've been mia from the blog, but i promise i have been busy in my kitchen! here's one of my favorites, especially as the weather begins to get chilly (haha, get it?). i know you midwesterners are expecting your first snowfall tomorrow, so here's a recipe to snuggle down with on those cold winter nights :o)
equipment:
frying pan
can opener
crockpot or dutch oven with lid
ingredients:
2 T. olive oil
1 - 1 1/2 lb. ground beef
1/2 c. corn (or 1 can--i used the southwest mix canned whole kernel corn)
1/2 c. red pepper, chopped
1/2 an onion (i used red), chopped
2 t. minced garlic
1 t. chili powder
1 t. dried cilantro
1 T. worcestershire sauce
3/4 t. salt
1 14.5 oz. can whole tomatoes
1 16 oz. can chili beans
1/4 c. chipotle tobasco sauce
1 12 oz. can tomato paste
4-6 oz. water
steps:
1.) cook ground beef in oil and add in corn, red pepper, onion, garlic, chili powder, cilantro, worcestershire, and salt when almost done. cook until beef is done and onions are transparent.
2.) while the beef mixture is cooking, cut the canned whole tomatoes into bite-sized pieces. Add the beef mixture, tomatoes (without the remaining juice), chili beans (with all remaining sauce), chipotle tobasco sauce, tomato paste and water into a crockpot or dutch oven. cover and cook on low or simmer for about 8 hours
time: 20-30 minutes prep, 8 hours to let it simmaaaahh
difficulty: 1.5 (1 being easiest, 5 being hardest)
rating: ♦♦♦♦1/2◊ (4.5 out of 5 stars)
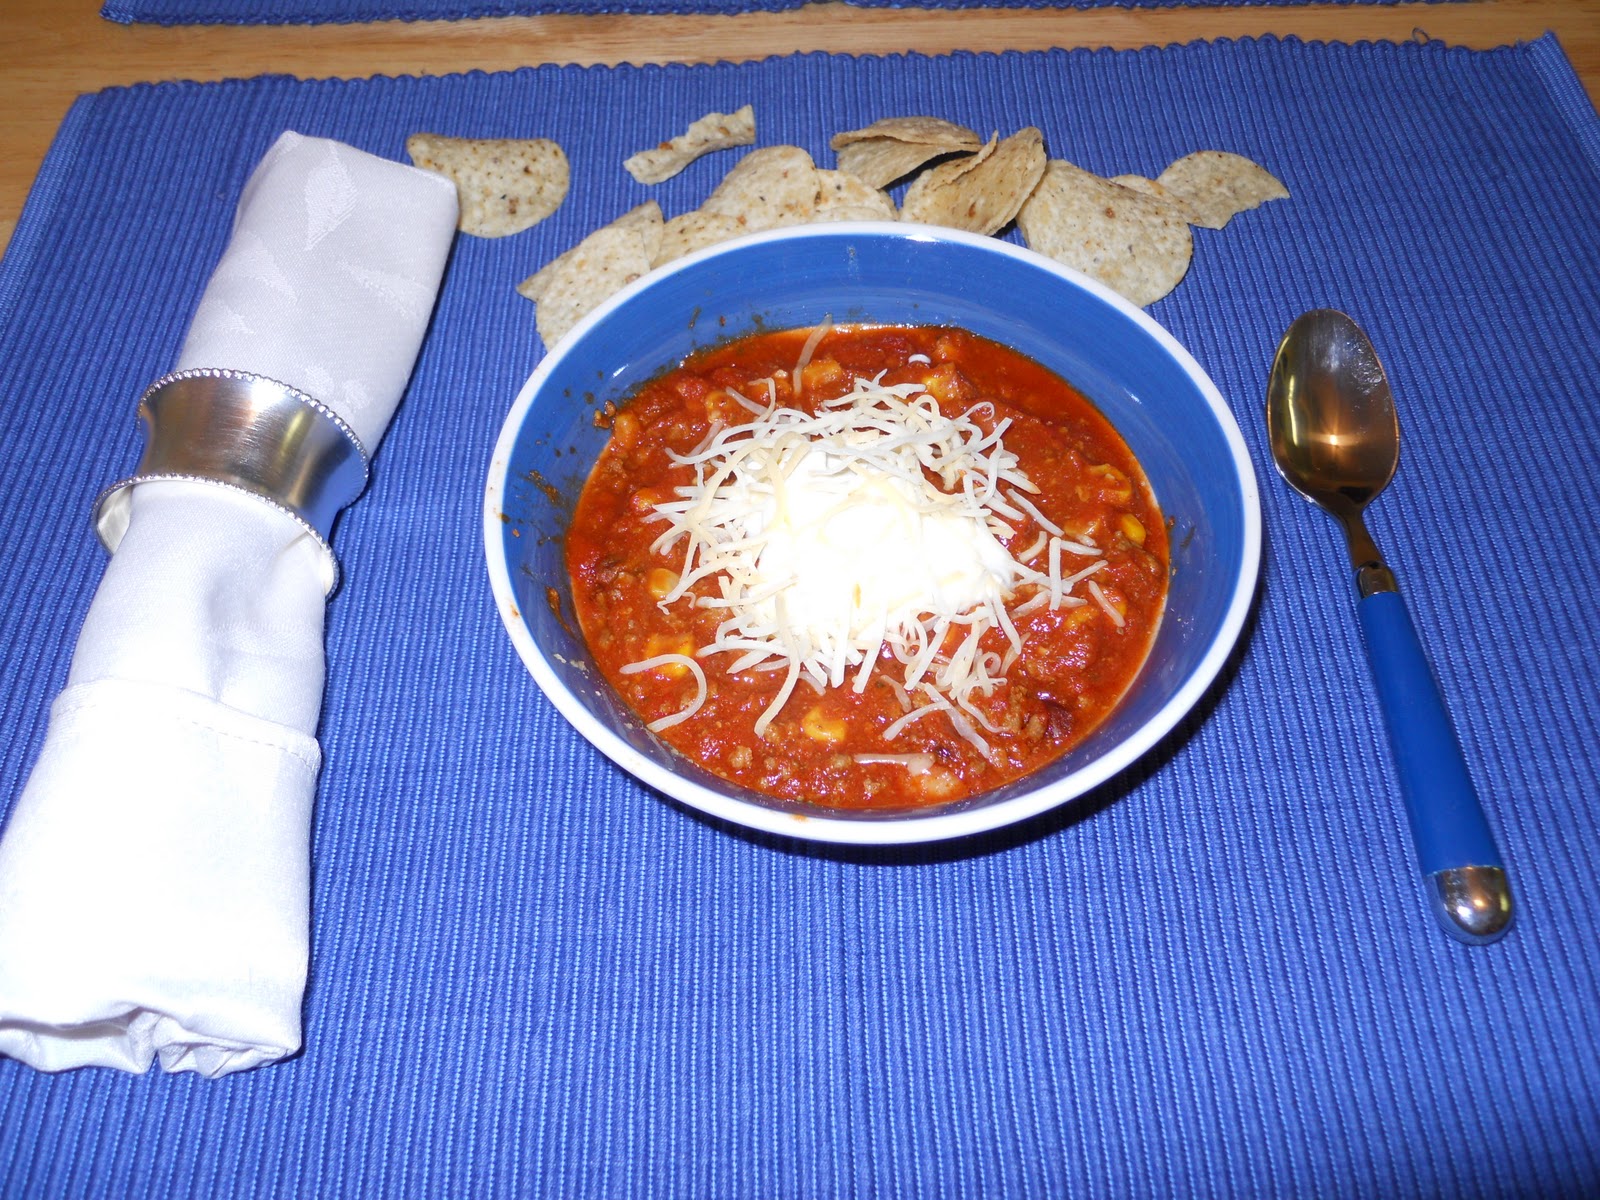
suggestions for variation: serve it with sour cream and/or cheese. try eating it with tortilla chips or nachos instead of a spoon.
stay warm and enjoy!
-kl
Friday, November 12, 2010
Sunday, October 10, 2010
034: tomato turkey saute with rice
hello there! i know this is delayed, but trust me, that does NOT mean i haven't been busy creating in my new kitchen! it just means i've had a lack of time to post to you fine people about it. anyway, this creation was tonight's dinner, and delicious it was. the flavors are creole-inspired (what, i live in the south now), and i put it on rice, though you could feasibly do it over noodles as well. the result was an easy (and yummy) tomato and turkey saute that took me about half an hour to make.
equipment:
frying pan/skillet with cover
heat-proof spoon/spatula
knife and cutting board
can opener
medium mixing bowl
rice cooker or pot in which to cook it
ingredients:
2 T. olive oil
2/3 to 3/4 lb. turkey (though i wanted to use tenderloins cut into bite-sized pieces, i ended up using ground breast due to lack of variety at my local supermarket)
1/2 t. minced garlic
1 can stewed tomatoes
1 small can tomato sauce
1 T. brown sugar
1/2 t. sriracha sauce
1/4 t. cilantro
1/4 t. crushed red pepper
1/4 t. chili powder
1/2 red pepper cut into strips
1/4 red onion cut into strips
rice and water to make 1 c. cooked rice
steps:
1.) heat olive oil in frying pan/skillet. add turkey and garlic and cook fully. in the meantime, begin cooking rice, either in cooker or pot.
2.) while turkey is cooking, cut onion and pepper. in medium mixing bowl, mix together stewed tomatoes, tomato sauce, brown sugar, sriracha, cilantro, crushed red pepper, and chili powder.
3.) when turkey is cooked, add onion and red pepper and saute for about a minute. add tomato sauce mixture, and simmer about 5 minutes. cover and simmer another 15 minutes or so. serve hot over rice.
time: about half an hour
difficulty: 1.5 (1 being easiest, 5 being hardest)
rating: ♦♦♦♦1/2◊ (4.5 out of 5 stars)
suggestions for variation: try it over noodles instead of rice. try it with different meats.
enjoy!
-kl :o)
Friday, September 17, 2010
033: you guessed it--another birthday!
so yesterday was my wonderful boyfriend's 22nd birthday (happy birthday, darlin!), so of course i had to make him a cake (as well as his banana pudding--it was a party, after all!). anyway, james's favorite baseball team is the los angeles dodgers, and so what better way to celebrate than by making a cake in the shape of a dodgers jersey? i do, however, have to credit his mom with this perfect idea. thanks annette! and happy birthday, james!
equipment:
mixing bowl
measuring cups and spoons
9x13" pan
cutting board
sharp knife
frosting knife
food coloring
frosting tips
candles
ingredients:
1 box (you know i cheat) cake mix (i used devil's food--james's favorite) and the ingredients on the box
2 cans frosting (i used cream cheese)
steps:
1.) make cake according to box instructions and bake in a 9x13" pan. i also pulled out 1 cupcake's worth of batter and baked it in a silicone cupcake liner (which is awesome cuz you can let it bake freestanding in the oven and it took the same time as the rest of the cake) to use for the baseball. let everything cool completely, and the flip it onto a cutting board by placing the cutting board upside down on top of the pan and turning it over. freeze this until cake is hard.
2.) cut the cake into the shape of a jersey. i cut out the neckline and then only about an inch off the sides underneath the sleeves. i then added some of this cut out cake to the sleeves to make them proportional, connecting them with some of the frosting.
3.) crumb coat the cake and freeze it again (this just makes it all easier to work with).
4.) frost the cake in the colors of the team of your choice. obviously for james this was the dodgers. i used the most awesome frosting tool of all time that i inherited from my mom (thanks mom!) who inherited it from her grandmother. it is a metal tube that holds frosting and the end pushes down to push frosting out of one of 12 tips that go with it (pictured above). it made frosting control soooo much easier! love it. i then decorated the cupcake into the shape of a baseball and put candles on (as buttons). easy, fun, done.
time: less than 10 minutes prep time, 35 minutes bake time, cool and freeze time, about an hour to crumb coat then decorate
difficulty: 1.5 (1 being easiest, 5 being hardest)
rating: ♦♦♦♦1/2◊ (4.5 out of 5 stars)
suggestions for variation: try different jerseys and teams. have fun with it!
anyway, happy 22nd birthday, james! i love you!
-kl
032: welcome to the south! banana pudding
why hello there! yes, i know it's been forEVer since i've posted, but i have been sooo busy (yes, i know i always say this, too). but this time i think my excuse is pretty legit--i moved to florida and have been establishing my new kitchen. it's super cute with yellow and black tiling on the counters and tons of cabinet/cupboard space--i love it! also, my AMAZING housewarming gift from my wonderful parents was an electric 12 speed cuisinart standing mixer with a whip, dough hook, paddle, and splash guard and places to put on attachments such as a meat grinder, pasta maker, blender, food processor, juicer, and etc. loooooovvvvveeee it!!!! anyway, i am loving florida life and my job, and of course being able to see my fantastic boyfriend everyday. in fact, yesterday was his birthday (happy 22, love!). to celebrate, i made his favorite dessert of all time (which i had never even heard of til i moved to the south last summer): banana pudding. it was easy and delicious AND i got to use my new mixer! all in all it only took about half an hour. i hope you northerners give it a try and that all enjoy!
equipment:
mixer (handheld or standing)
spatula
mixing bowl
measuring cups and spoons
9x13" pan
knife
ingredients:
8 oz. cream cheese, softened
1 can sweetened condensed milk
1 package instant banana cream pudding mix (dry)
2 c. milk
1 1/2 t. vanilla
1 carton cool whip
6 bananas, sliced
1 box vanilla wafer cookies
steps:
1.) beat softened cream cheese on medium until fluffy.
2.) in a separate bowl, whisk instant pudding mix with milk. add pudding mixture, sweetened condensed milk, and vanilla to cream cheese. beat all together on medium until smooth. fold in cool whip until smooth.
3.) in a 9x13" pan layer pudding mixture, vanilla wafer cookies, and sliced bananas. chill and serve cold.
time: about 30 minutes
difficulty: 1 (1 being easiest, 5 being hardest)
rating: ♦♦♦♦1/2◊ (4.5 out of 5 stars)
suggestions for variation: i wanted to try this with adding some banana liqueur and/or rum to the mix, but i didn't have time to run to the liquor store. next time, though!
enjoy!
-kl :o)
Tuesday, July 13, 2010
031: World CupCakes
SPAIN WINS THE WORLD CHAMPIONSHIP!!!! ESPANA ES EL CAMPEON DEL MUNDO!!!! anyway... can you guess who i was rooting for in the world cup?? to celebrate the occasion (just that they made it into the finals! their victory made this treat even sweeter), i made a world cup cake. just thought i'd share :o)
i made this cake (the recipe is written for a 9x13" pan) in an 11x7" pan with 6 cupcakes. i frosted it green and piped it with white to resemble a soccer pitch, then made the corner flags out of toothpicks and colored mailing labels, and finally the goals out of toothpicks and string. the cupcakes i then frosted white and piped with chocolate to resemble soccer balls, and i made the flags again out of toothpicks and colored mailing labels. anyway, it was fun, well-liked, and delicious (though, of course, victory always tastes sweet!). VIVA LA FURIA ROJA!!!
-kl :o)
Saturday, July 03, 2010
030: salmorejo
hello there! sorry for my absence--i had reconstructive bone surgery on both feet a few weeks ago and have only recently been able to stand for any length of time. so! what do i do when i can stand again? get back in my kitchen, of course! in order to celebrate the world cup and my LOVE for spain (and fernando torres!) and all things spanish, i decided to make some salmorejo (sal-more-AY-hoe)--a tomato and garlic spanish soup that is served cold. it's great for summer, and it's so easy!
equipment:
chef's knife
measuring cups and spoons
serrated knife
food processor or blender
ingredients:
1 lb. ripe tomatoes
2 cloves minced garlic, or to taste (i used about 3)
1/4 c. olive oil (spanish if you can get it)
1 T. + 1 t. vinegar
french bread baguette
salt to taste
hard boiled eggs for garnish
iberian ham or bacon bits for garnish
cilantro for garnish
steps:
1.) cut about half of the french bread baguette into slices and leave out to stale a bit (an hour or two will be fine).
2.) cut the tomatoes into chunks and put them into food processor or blender. then add garlic, olive oil, and vinegar and blend until smooth.
3.) peel the bread part of the french bread baguette away from the crusts. add it to the tomato mixture one piece at a time and blend (also one piece at a time). continue adding pieces of bread until the mixture has about the same viscosity as pudding (or a little thinner).
4.) chill for a half an hour or more. as the soup chills, hard boil about 1 egg for every 2 people being served. put eggs into a saucepan and cover in cold water. add about 1 T. of vinegar and 1 t. of salt to the water. bring to a rolling boil, and as soon as it boils, turn the heat down and simmer for about 1 minute. then take it off the heat and cover and let stand for about 10 minutes. the eggs are done when you spin them on the counter and they stay upright. cool them down by putting them in cold water or ice, depending on how quickly you need to serve them. peel and chop into small pieces.
5.) ladle or spoon into bowls, and garnish with cut up hard boiled eggs, iberian ham/bacon bits, and/or cilantro. add salt to taste. serve with slices of the rest of the baguette of french bread (i even like to use these as edible spoons and never actually touch a real utensil!).
time: 1-2 hours for bread to stale, 30 minutes to prepare, 30+ minutes to chill
difficulty: 1.5 (1 being easiest, 5 being hardest)
rating: ♦♦♦♦1/2◊ (4.5 out of 5 stars)
suggestions for variation: play around with the proportions of everything until you find the combination that works best for you.
enjoy :o)
-kl
Wednesday, June 02, 2010
029: another birthday!
this time it was my mom's birthday, and she loves her garden. so what more fun could be had than a flower-themed birthday cake? or, rather, cupcakes. this was fun, and easy, and absolutely adorable. i got compliments all night long on these sunflowers :o)
equipment:
knife
plastic bag
scissors
frosting tips if you have them (petal and point)
small flower post (i used really fun colored 3.3" plastic pots from the hardware store (washed, of course!) and stuffed the bottom)
paper to stuff the bottom of your flower pots
indredients:
cupcakes (i used my red velvet cupcake recipe)
frosting (i used chocolate cream cheese on top of the cupcakes and dyed vanilla for the flowers)
food coloring
oreo or oreo style cookies
steps:
1.) frost your cupcakes with frosting (i used chocolate cream cheese, as it's brown, which looks more like dirt than regular cream cheese frosting to pair with red velvet cupcakes).
2.) place a small daub of the same frosting on the back of an oreo-style cookie and put either one or two cookies on top of each cupcake.
3.) use either colored or dyed frosting for the next part (i used vanilla and colored it yellow with food coloring). if you don't have frosting tips, place your frosting into a plastic bag and cut one of the corners off (make sure it's small! frosting comes out quickly, and you can always make it bigger if necessary). if you do have frosting tips, do the same using the petal tip.
4.) draw petals around the edges of each oreo-style cookie.
5.) repeat step 3 with green frosting, this time using the pointed tip for drawing the leaves. draw the leaves straight onto the top of the cupcakes.
6.) it might be prudent at this point to freeze your cupcakes, covering them very lightly with plastic cling wrap. this will harden the frosting and make it easier to handle for the next part.
7.) stuff the bottom of your flower pots with some kind of paper (given the birthday theme i used tissue-style paper) so that the new bottom of the pot is about 2 inches from the top.
8.) place your cupcakes into the pots!
time: about an hour for decorating and finishing time
difficulty: 2 (1 being easiest, 5 being hardest)
rating: ♦♦♦♦♦ (5 out of 5 stars)
suggestions for variation: play around with different cupcake and frosting combos, different cookies, and different kinds of flowers. just have fun with it!
enjoy :o)
-kl
equipment:
knife
plastic bag
scissors
frosting tips if you have them (petal and point)
small flower post (i used really fun colored 3.3" plastic pots from the hardware store (washed, of course!) and stuffed the bottom)
paper to stuff the bottom of your flower pots
indredients:
cupcakes (i used my red velvet cupcake recipe)
frosting (i used chocolate cream cheese on top of the cupcakes and dyed vanilla for the flowers)
food coloring
oreo or oreo style cookies
steps:
1.) frost your cupcakes with frosting (i used chocolate cream cheese, as it's brown, which looks more like dirt than regular cream cheese frosting to pair with red velvet cupcakes).
2.) place a small daub of the same frosting on the back of an oreo-style cookie and put either one or two cookies on top of each cupcake.
3.) use either colored or dyed frosting for the next part (i used vanilla and colored it yellow with food coloring). if you don't have frosting tips, place your frosting into a plastic bag and cut one of the corners off (make sure it's small! frosting comes out quickly, and you can always make it bigger if necessary). if you do have frosting tips, do the same using the petal tip.
4.) draw petals around the edges of each oreo-style cookie.
5.) repeat step 3 with green frosting, this time using the pointed tip for drawing the leaves. draw the leaves straight onto the top of the cupcakes.
6.) it might be prudent at this point to freeze your cupcakes, covering them very lightly with plastic cling wrap. this will harden the frosting and make it easier to handle for the next part.
7.) stuff the bottom of your flower pots with some kind of paper (given the birthday theme i used tissue-style paper) so that the new bottom of the pot is about 2 inches from the top.
8.) place your cupcakes into the pots!
time: about an hour for decorating and finishing time
difficulty: 2 (1 being easiest, 5 being hardest)
rating: ♦♦♦♦♦ (5 out of 5 stars)
suggestions for variation: play around with different cupcake and frosting combos, different cookies, and different kinds of flowers. just have fun with it!
HAPPY BIRTHDAY, LYNN!
enjoy :o)
-kl
Subscribe to:
Posts (Atom)